
Blog
What Should a Site Manager Record During an Inspection?
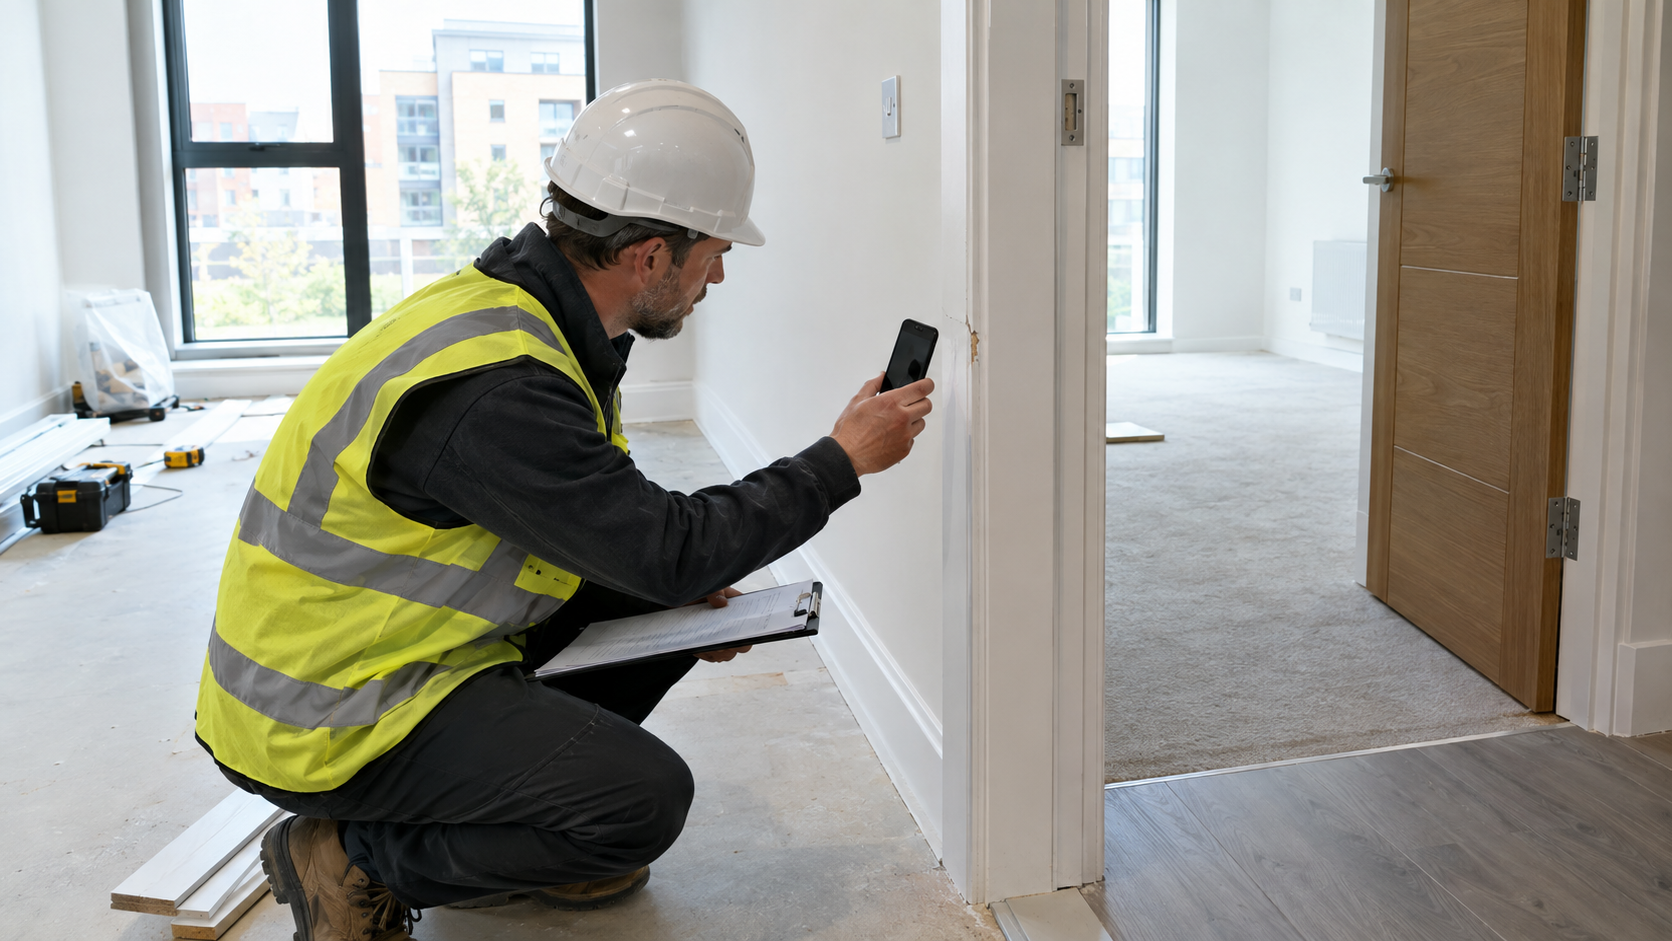
A site inspection is only useful if the observations can be understood and acted on afterwards. A note such as “issue on wall” may remind the person who wrote it what they saw, but it gives a project team very little information about where the problem is, what needs to happen next or whether it has actually been resolved.
A practical site inspection checklist should therefore cover more than defects. A good inspection record captures the location, condition, evidence, action required, responsible person and current status.
For site managers, the goal is simple: create an accurate record that can move an issue from observation to action and, ultimately, closeout.
What should a site manager record during a site inspection?
At a minimum, record:
- Inspection date and time
- Project or site
- Area, level, room or work zone
- Specific element inspected
- What was observed
- Photographic evidence where useful
- Exact location of the issue
- Action required
- Person, trade or contractor responsible
- Priority or required response
- Current status
- Follow-up or reinspection requirement
- Evidence that the issue has been resolved
The exact fields will depend on the type of inspection. A quality inspection, pre-handover inspection, subcontractor inspection and routine site walk may require different levels of detail. The principle remains the same: record enough information that another member of the team can understand the observation without having been present.
Why inspection records matter
Construction teams often have several inspections, trades and outstanding issues happening at the same time. Information can quickly become fragmented between notebooks, photographs, spreadsheets, emails, messaging apps and verbal conversations.
A structured inspection record helps establish a reliable reference point. It can help a site manager identify recurring issues, communicate defects to the right trade, prioritise corrective action, demonstrate what was observed, track outstanding work, compare findings across inspections, support construction handover, create a useful inspection report and confirm whether corrective work has been completed.
1. Record the project and inspection details
Start with enough information to identify the inspection. Record the project name or reference, site or building, inspection type, date, time where relevant, inspector and relevant phase or work package.
Example:
Project: Riverside Apartments
Inspection: Internal finishes quality inspection
Date: 17 September
Area: Block B, Level 3
2. Record the exact location
Location is one of the most important parts of an inspection record.
“Defect in apartment” is not a useful location. A better description might be:
“Block B → Level 3 → Apartment 3.14 → Bedroom 2 → east wall beside window.”
For larger projects, include additional information where useful:
- Block
- Floor or level
- Plot or apartment number
- Room
- Grid reference
- Elevation
- Stair or core
- Work zone
- External area
- Drawing or plan reference
A simple structure is: Project → Building → Level → Area → Element → Exact position.
3. Record what you actually observed
An inspection record should describe an observation rather than an assumption.
Instead of “Bad plaster,” prefer “Visible uneven plaster finish approximately 600mm wide on the west wall of Bedroom 3, with a raised area around the socket.”
Be specific about size, position, material, condition and extent. Avoid adding a technical diagnosis unless you are qualified and the inspection supports it.
4. Add photo evidence
Photographs can make inspection records significantly easier to understand.
A useful approach is to take:
- A context photograph showing where the issue is
- A close-up showing the condition clearly
- A marked-up photograph where the precise location is difficult to identify
Useful inspection photos should be in focus, show the relevant issue clearly, include enough surrounding context, avoid unnecessary clutter, be linked to the correct inspection record and make the location understandable. Where a measurement is relevant, include an appropriate reference or record the approximate dimensions separately.
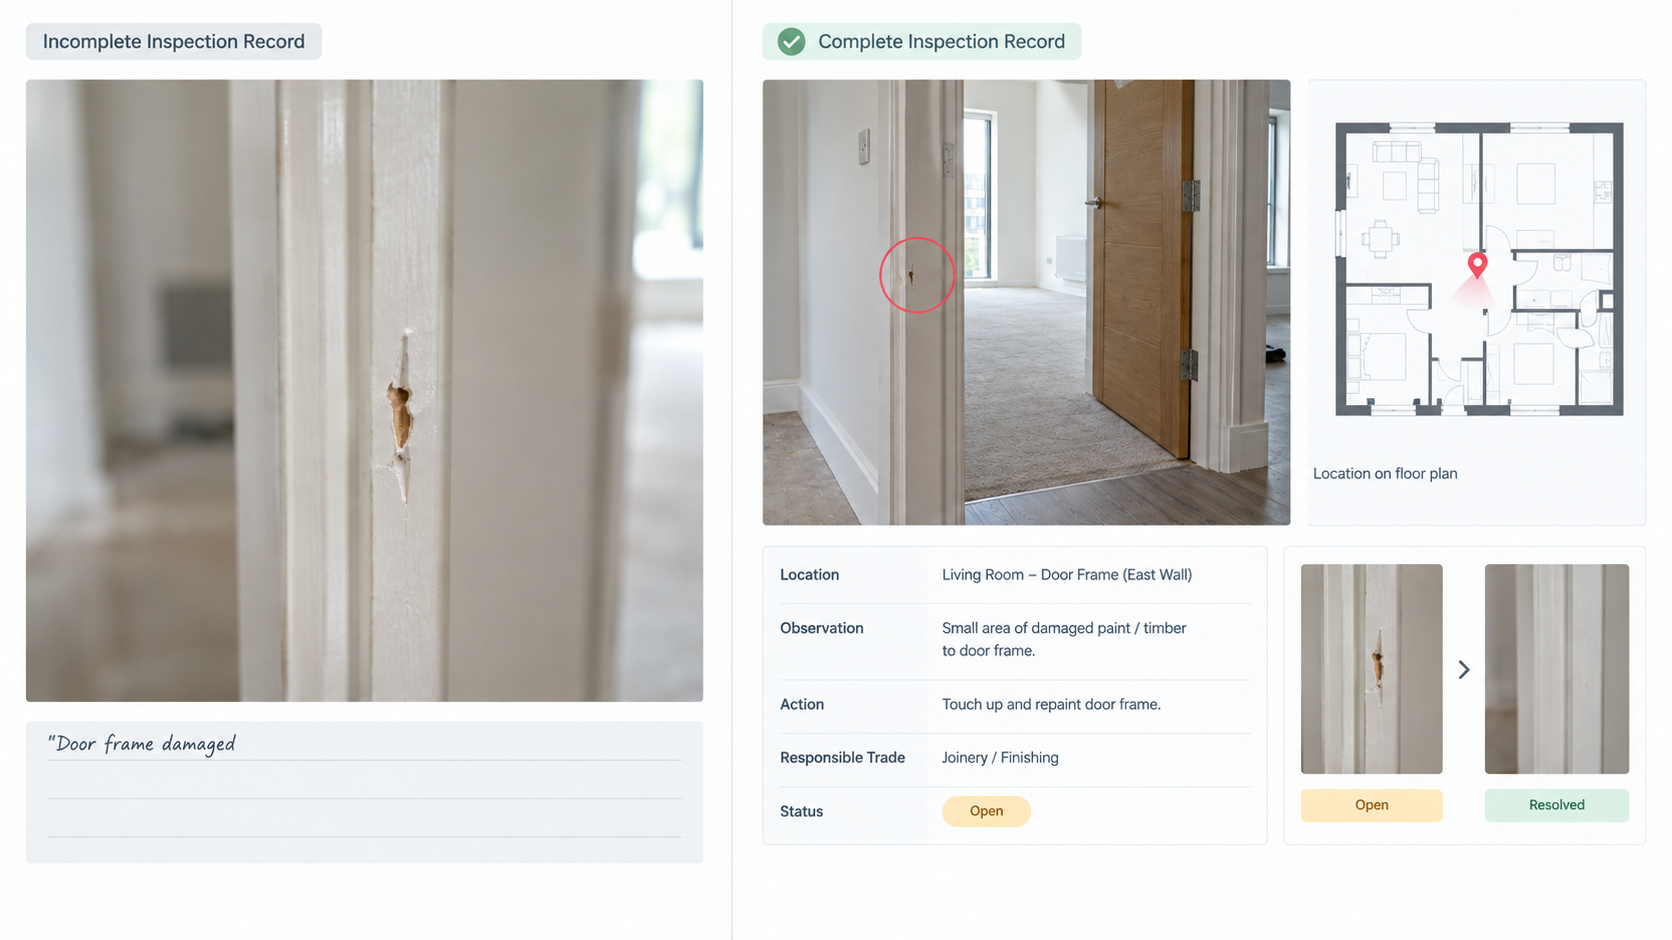
A useful issue record connects the defect, its location, evidence and follow-up requirement.
5. Record the inspection finding clearly
Separate the observation from the action.
Finding: “Two cracked floor tiles visible outside Apartment 2.08 entrance.”
Action: “Replace damaged tiles and confirm matching finish.”
This makes the record easier to assign and track.
6. Record who is responsible
A finding is much easier to manage when responsibility is clear. Depending on the project, assign the issue to a subcontractor, trade, site operative, project team member, specialist contractor, main contractor or another responsible organisation.
Example:
Issue: “Sealant gap around shower tray in Apartment 4.06 bathroom.”
Responsible: “Plumbing / finishing subcontractor.”
Action: “Renew sealant and check complete perimeter.”
7. Record the required action
The action should be practical and proportionate.
Weak: “Fix.” Better: “Remove damaged section, replace plasterboard patch, prepare surface and redecorate.”
Or, where the remedy is not yet known: “Review visible water staining below window and investigate source before making good.”
8. Record priority where appropriate
Not every inspection finding needs the same response. A site manager may need to distinguish between immediate safety concerns, issues that could cause further damage, defects that could affect following trades, quality issues requiring correction before handover, minor cosmetic items and items requiring monitoring or further investigation.
Use the project’s own terminology and escalation process. Avoid treating every defect as an emergency, while ensuring potentially serious issues are not buried in a general snag list.
9. Record status
A status gives the team a quick view of what still needs attention. A simple workflow could be:
Open → Assigned → In progress → Ready for inspection → Resolved
Consistency matters more than the exact labels.
10. Record follow-up requirements
Some observations can be closed immediately. Others require a return visit. Record the follow-up date where appropriate, what needs to be checked, whether another trade must complete work first, whether photographs or other evidence are required and whether the issue remains open.
Example: “Reinspect after bathroom silicone replacement. Confirm continuous seal and no visible gaps.”
11. Record verification, not just completion
A contractor’s statement that work is complete is not the same as verification. A useful workflow separates:
- Reported: “The subcontractor has been notified.”
- Completed: “The subcontractor reports that the repair is complete.”
- Verified: “Site inspection confirms the damaged plaster has been repaired and redecorated.”
Only the final stage demonstrates that the issue has been checked.
12. Record incomplete work as well as defects
A construction inspection is not limited to physical defects. Record work that is missing, incomplete, not ready for inspection, awaiting another trade, installed but awaiting required commissioning, different from the agreed specification or awaiting final finishing.
Example: “Kitchen installed but splashback tiling incomplete.”
13. Record quality issues consistently
Quality inspection becomes more effective when observations are recorded using a consistent standard. For repeated work, compare similar elements and use the same categories across rooms or plots.
14. Record safety issues through the correct process
Site inspections can identify safety concerns, but the inspection record should follow the project’s health and safety procedures. Where a serious or immediate hazard is observed, follow the site’s established escalation and control process rather than relying on the defect-tracking record alone.
15. Record information needed for handover
As a project approaches construction handover, inspection records become increasingly valuable. Outstanding issues should be easy to identify by location, description, responsibility, status, required action and verification.
A practical site inspection checklist
Project details
- Project name
- Site/building
- Inspection date
- Inspector
- Inspection type
- Relevant work package or phase
Location
- Block
- Level
- Plot/room
- Area
- Element
- Exact position
- Plan or drawing reference
Condition
- What was observed?
- What material or element is affected?
- What is the extent?
- Is it damaged, incomplete, misaligned, poorly finished or not operating as expected?
- Does it require further investigation?
Evidence
- Context photograph
- Close-up photograph
- Marked-up image where useful
- Measurement or reference where appropriate
- Relevant drawing/specification reference
Action
- What needs to happen?
- Is further investigation required?
- Who is responsible?
- What priority or response is required?
- Is another trade involved?
Tracking
- Status
- Date assigned
- Follow-up date
- Reinspection requirement
- Verification
- Final closeout
Turning a weak inspection note into a useful record
Weak note: “Door problem in flat 12.”
Useful record: “Block C → Level 4 → Apartment 4.12 → Bedroom 1 → internal door. Door catches against frame when closing. Visible contact mark on latch side of frame. Adjust door/frame as required and confirm smooth closing. Assigned to joinery contractor. Status: Open.”
This gives the team a location, observation, action, responsibility and something specific to verify later.
Common site inspection recording mistakes
- Writing notes that only make sense to the inspector
- Taking photos without locations
- Recording symptoms as causes
- Assigning everything to one person
- Forgetting verification
- Mixing different inspection types
Paper, spreadsheet or digital inspection?
The right recording method depends on the size and complexity of the work. A notebook can be adequate for quick observations, but information may need to be transferred later. A spreadsheet can provide structured records and filtering, but photographs, locations and field updates can become awkward as inspection volume increases. A digital inspection workflow can bring the inspection record closer to the point where the observation is made.
Useful capabilities can include mobile issue capture, photo evidence, photo markup, location pins, site-plan markup, assignment, team collaboration, offline inspection, status tracking and professional PDF and Excel/XLSX reporting.
How Site Audit & Plan fits into the inspection workflow
For teams carrying out repeated inspections, Site Audit & Plan is designed around the practical workflow of capturing and managing site issues. A site manager can use a digital process to capture the issue on site, add photo evidence, record its location, assign it to the relevant person and track it through to completion.
The platform supports mobile and web access, offline functionality, photo capture and annotation, location and site-plan markup, issue assignment, team collaboration, tracking, and PDF and XLSX/Excel reporting.
Building a repeatable inspection process
- Prepare the checklist before entering the site.
- Define the inspection scope.
- Inspect systematically by area or work package.
- Record each observation immediately.
- Photograph defects and important conditions.
- Pin or describe the exact location.
- Assign required actions.
- Review outstanding issues.
- Reinspect completed work.
- Close only verified items.
Frequently asked questions
What should be included in a site inspection report?
A useful report can include project and inspection details, location, observations, photographs, required actions, responsibility, status, follow-up requirements and verification.
Why is location important in a construction inspection?
A precise location allows the responsible person to find the issue quickly and reduces ambiguity when several similar rooms, units or elements exist.
Should every site inspection issue have a photograph?
Not necessarily, but photographs are valuable evidence for many defects, quality issues and site conditions. Use them where they improve understanding or provide useful evidence.
How detailed should a site inspection description be?
It should be detailed enough for another person to understand what was observed and where it was found without needing the inspector to explain it verbally.
Should site inspection findings be assigned to specific trades?
Where responsibility is clear, assigning an issue to the relevant trade, contractor or team member can make follow-up more efficient.
When should a construction inspection issue be closed?
Close an issue when the required action has been completed and, where appropriate, the result has been inspected and verified.
What is the difference between an inspection finding and a defect?
An inspection finding is an observation made during an inspection. It may be a defect, incomplete work, safety concern, quality observation, condition requiring monitoring or something requiring further investigation.
Can a site inspection be managed digitally?
Yes. Digital inspection tools can combine issue capture, photographs, locations, assignments, status tracking and reporting in one workflow. They can be particularly useful for teams conducting repeated inspections.
Final takeaway
A good site inspection record should allow someone who was not present on the site walk to understand what was observed, where it was found, what needs to happen, who is responsible and whether the issue has been resolved.
A practical site inspection checklist should therefore cover more than defects. Include project details, precise locations, observations, photo evidence, actions, responsibility, priority, status, follow-up and verification.
For construction teams carrying out repeated inspections, a structured digital workflow can make that process easier to maintain across sites, trades and projects.