
Blog
Common New Build Defects: What Should You Look For?
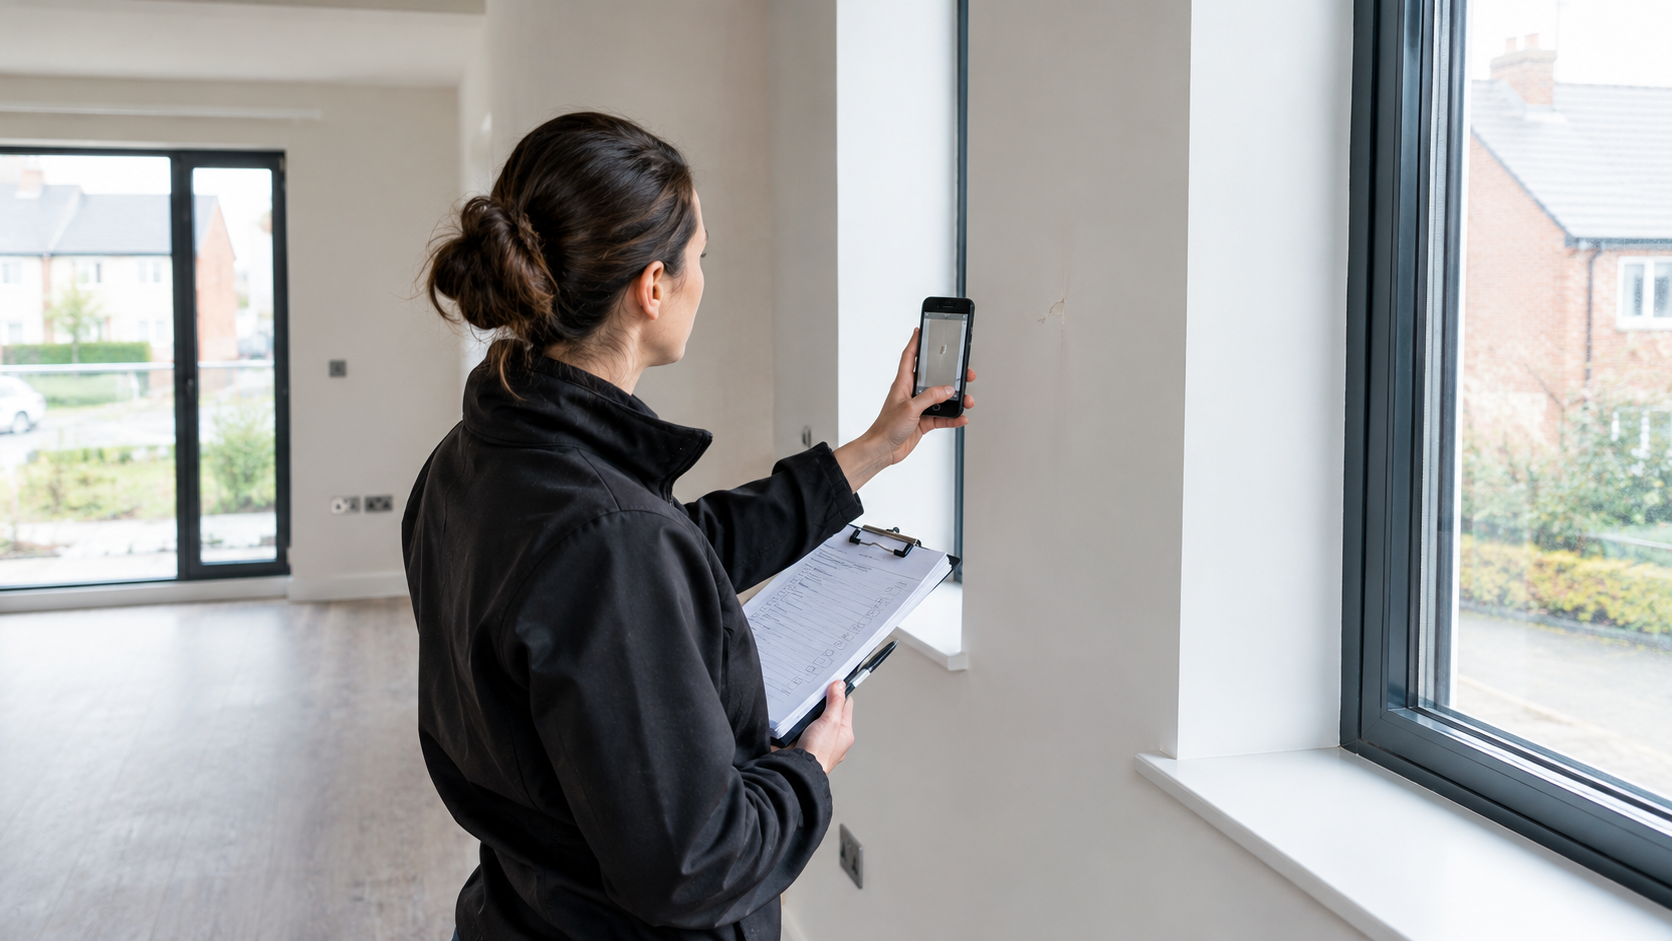
Buying a new-build home does not necessarily mean every detail will be perfect at handover. Finishing defects, incomplete work and small installation issues can still occur, which is why a structured inspection is useful.
A new build snagging checklist gives homeowners a practical way to inspect the property room by room, record issues clearly and make sure reported defects are checked after repairs.
What is new build snagging?
New build snagging is the process of identifying defects, unfinished work or items that need attention in a newly built or recently completed property.
Common examples include:
- Damaged walls or surfaces
- Uneven paintwork
- Gaps around fittings, trims or sealant
- Sticking doors or windows
- Damaged or poorly finished flooring
- Loose fittings
- Incomplete finishes
- Fixtures that do not operate as expected
- Incomplete external areas or landscaping
The aim is not simply to create the longest possible snagging list. It is to produce a clear, useful record that allows each issue to be located, understood, addressed and checked.
New build snagging checklist: room by room
1. Walls and ceilings
Check walls and ceilings from different angles and in different lighting conditions where possible. Look for:
- Cracks, dents and impact damage
- Uneven plaster or visible imperfections
- Poorly finished joints and corners
- Screw or fixing marks
- Inconsistent paint coverage, drips, runs or rough paintwork
- Gaps around sockets, switches, doors, windows and other openings
- Damage caused by other trades
- Stains or signs of moisture
Do not automatically assume that every hairline mark is structural. Record what you can see clearly, and seek appropriate professional advice if you are concerned about significant or recurring cracking, movement or other potentially serious defects.
2. Floors and skirting
Inspect flooring across the whole room, including edges, corners and transitions. Check for scratches, chips, uneven flooring, gaps between materials, loose or cracked tiles, damaged thresholds, gaps or damage to skirting boards, poor paint or sealant finishes, and poor transitions between different flooring materials.
3. Internal doors and frames
Open and close every internal door. Look for doors that stick or fail to close correctly, loose hinges, damaged doors or architraves, misaligned handles, latches or locks that do not operate correctly, uneven gaps, poor paintwork and incomplete finishing.
4. Windows
Inspect every window from inside and, where safely accessible, outside. Check glass for scratches, frames and seals, gaps around reveals, handles and locking mechanisms, ease of opening and closing, window boards, signs of water ingress and unusual condensation or visible moisture issues.
5. Kitchen
- Cabinet doors, drawers, worktops and joints
- Alignment, handles and drawer operation
- Gaps and sealant around the sink
- Splashbacks, tiles and extractor arrangements
- Appliances included in the specification
- Sink and tap operation
- Visible plumbing connections for leaks
- Missing shelves, fittings or accessories
- Service penetrations and visible finishing
6. Bathroom and en-suite
Look for damaged or poorly aligned tiles, inconsistent grout, gaps or poor silicone finishes, damaged sanitaryware, taps and fittings that do not operate correctly, shower operation, mirrors and accessories, cabinets, visible pipework, leaks or moisture, shower doors and screens, and drainage problems.
7. Electrical fittings
Carry out basic visual checks and safe operation checks only. Look for damaged sockets or switch plates, loose or visibly misaligned fittings, missing covers, damaged light fittings, loose visible cables, controls that do not operate as expected, and differences between installed fittings and the agreed specification.
Do not dismantle electrical fittings or carry out unsafe electrical tests yourself. Suspected electrical faults should be assessed by a suitably qualified professional.
8. Plumbing
Check visible plumbing installations throughout the property for leaks, dampness or staining, poorly finished pipe penetrations, problems with taps or fittings, inadequate-looking sealant, drainage issues, missing accessories and signs of water damage. Report leaks promptly.
9. Heating and ventilation
Look for damaged radiators or visible components, poor finishing around installations, missing accessories, damaged controls, controls that do not respond as expected, damaged or incomplete vent covers and signs of installation damage. Use the handover information for normal operation and get qualified help for faults that cannot be safely assessed by basic checks.
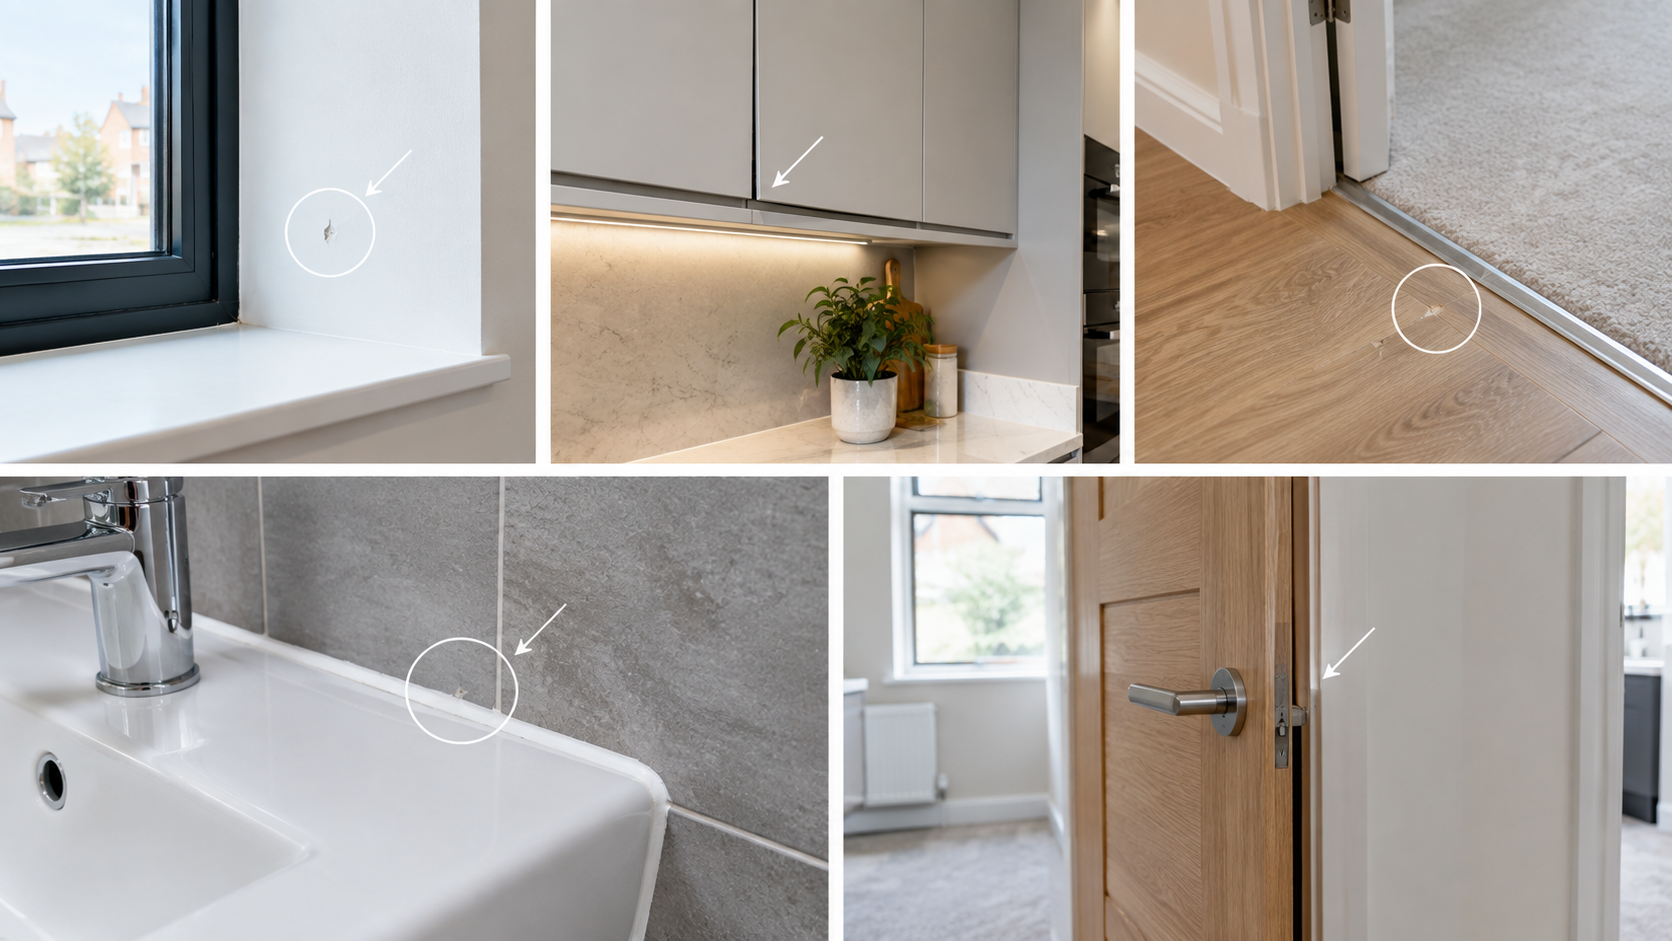
Common new-build defects can appear in finishes, flooring, kitchens, bathrooms and joinery.
10. Stairs, joinery and woodwork
Check for scratches and dents, poor paint or varnish finishes, visible gaps or poor joints, loose components, handrail condition, damaged stair edges, cupboard doors and shelves, and poor finishing around fitted storage.
11. Bedrooms and living areas
Inspect each room individually. Check walls and ceilings, flooring, skirting and trims, doors and windows, heating, electrical accessories, storage and joinery, paintwork, fixtures and fittings.
12. Garage, loft and storage areas
Where accessible and included with the property, inspect less frequently used spaces for incomplete finishes, damage, water staining, poorly finished joints, missing fittings, problems with doors and seals, incomplete storage and visible service installation issues.
13. Exterior and garden
Do not stop your snagging inspection at the front door. Check external walls, brickwork or render, windows and external doors, sealant, gutters and rainwater goods, drain covers, paths, paving and steps, fencing and gates, garden levels, turf, landscaping, driveways, garages, external stores and external taps.
Record incomplete external work as well as obvious defects.
How to document a new-build snag
Avoid vague descriptions such as “Wall damaged.” Instead, describe the location, element, position and visible issue.
Example: Approx. 150mm vertical paint and plasterboard damage to the east wall of Bedroom 2, immediately left of the window reveal.
A useful location structure is:
Floor → Room → Element → Exact position
Photograph each issue as soon as you identify it:
- A wide or context photograph showing where the defect is
- A close-up photograph showing the defect clearly
- A marked-up photograph if the exact position is difficult to identify
DIY snagging vs professional snagging inspection
A DIY inspection can identify many obvious cosmetic issues. A professional snagging inspection can add an independent and systematic assessment, particularly if you are unfamiliar with new-build inspections, have limited time, have a large or complex property, want an independent record or are unsure how to assess particular defects.
The two approaches can complement each other.
A simple snagging workflow
Find → Photograph → Locate → Describe → Report → Check repair
Example: Scratched laminate flooring. Location: ground-floor hallway, approximately 500mm from the entrance. Evidence: one wide photograph and one close-up. Action: repair or replace in accordance with the agreed remedy. Status: outstanding. Follow-up: reinspect after the work is completed.
Tracking snag status
Open → Reported → In progress → Ready for inspection → Resolved
Do not close a snag simply because the builder says the work has been completed. Check the result yourself where appropriate.
How to keep your snagging evidence organised
For each snag, record:
- A unique reference
- Date identified
- Property location
- Specific description
- Photographs
- Required action
- Current status
- Follow-up date where useful
- Verification of the completed repair
For a small property, a spreadsheet or document may be sufficient. A digital snagging workflow can also bring photographs, locations, descriptions, assignments, statuses and reports together in one place.
Room-by-room inspection method
- Check the relevant property specification and handover information.
- Have your checklist ready.
- Inspect from top to bottom: ceiling, walls, windows, doors, fittings, electrical accessories, plumbing and heating, flooring, skirting, trims and fixtures.
- Carry out safe basic operation checks.
- Photograph issues immediately.
- Record the exact location and description before moving on.
Quick new build snagging checklist
Inside
- Walls and ceilings
- Floors and skirting
- Every internal door, handle and latch
- Windows
- Kitchen
- Bathroom and en-suite
- Visible plumbing
- Electrical accessories
- Heating and ventilation
- Stairs, handrails and joinery
- Built-in storage
- Loft, garage and storage areas
Outside
- External walls and finishes
- Windows and external doors
- Gutters and rainwater goods
- Paths, steps and paving
- Driveway
- Fencing and gates
- Garden and landscaping
- External fittings
- Garage and storage
Documentation
- Clear location
- Specific description
- Useful photographs
- Outstanding work identified
- Issues reported through the appropriate process
- Repairs checked before closure
Common new-build snagging mistakes
- Inspecting only at eye level
- Rushing because the property looks finished
- Taking contextless photographs
- Using vague descriptions
- Forgetting outside areas
- Closing snags without verification
- Treating every defect as structural
When to get professional help
Consider professional advice when you identify significant or recurring cracking, signs of water ingress, drainage problems, electrical faults, heating or ventilation faults, possible structural movement, defects you cannot confidently assess, or a large number of issues across the property.
Frequently asked questions
What are the most common new-build defects?
Common issues include cosmetic finishing defects, damaged surfaces, uneven paintwork, gaps, poor sealant, misaligned or sticking doors and windows, flooring damage, loose fittings, installation damage and incomplete work.
Is snagging necessary on a new-build home?
A structured snagging inspection can help identify defects, unfinished work and items that need attention.
What should I include in a new build snagging checklist?
Include walls and ceilings, floors and skirting, doors, windows, kitchen, bathroom, electrical fittings, plumbing, heating and ventilation, stairs and joinery, storage areas, garage or loft spaces and external areas.
When should I snag a new-build home?
Inspect as early as practical within the builder’s handover and access arrangements. If that is not possible, inspect as soon as practical afterwards and report issues through the appropriate process.
Can I do my own new-build snagging?
Yes. Homeowners can identify many visible cosmetic and finishing issues themselves. Using a digital snagging tool like Site Audit & Plan can help document and track issues effectively. A professional inspection can provide an independent and systematic assessment where required.
Should I hire a professional snagging inspector?
It can be useful where you have limited time, are unfamiliar with snagging, have a large or complex property, want an independent record or are unsure how to assess particular defects.
How should I photograph a snag?
Take a wide photograph showing the location and a close-up showing the defect. Add a marked-up image when the exact position is difficult to identify.
How do I write a good snagging description?
Describe what is visible and give a precise location. A useful format is Floor → Room → Element → Exact position.
Should I close a snag when the builder says it is fixed?
Where appropriate, check the completed work yourself before marking the issue as resolved.
What if I find a crack in my new-build home?
Record the crack clearly with photographs and its location. If it is significant, recurring or associated with other signs of movement, seek appropriate professional advice rather than assuming its cause.
Final takeaway
A new build snagging checklist gives homeowners a structured way to inspect a new property rather than relying on a quick visual walk-through.
Work room by room. Check walls, ceilings, floors, doors, windows, kitchens, bathrooms, services, joinery and external areas. Photograph issues clearly, record their exact location, describe what you can actually see, report them through the appropriate process and verify repairs before closing them.
The goal is not to produce the longest snagging list. It is to create a clear, useful record that helps each issue get understood, addressed and checked.